Hi, Blog readers!
This post features a tutorial for constructing a simple DIY light box for producing good photos of your small LEGO builds, or other small items.
Many of the LEGO build pics I have taken for this blog were done using such a system, and the results are generally very satisfactory.
So, what exactly is a light box?
Simply put, it's an enclosure that encompasses a light diffusion medium that helps eliminate glare and harsh shadows.
This is very important with LEGO models, as the ABS parts inherently have shiny, reflective surfaces.
Since my previous box had been accidentally crushed by other stuff in a storage space, I need to knock together another one. This would be a good opportunity to post a 'how-to' as well.
The heart of the system is a cardboard box.
Yep, it's that simple.
Select a box that is large enough to accommodate whatever sized LEGO builds that you normally do. You want a box large enough so that you have at least 4 inches of space on either side of the model, and above it.
You also want a bit of depth in the box, so that the model can easily be set far enough back to have your overhead light source illuminating the front of the model. Also, in order to avoid unwanted shadows or reflections, the model must be shielded from direct exposure to other light sources that may be in the room.
Since the majority of my builds are on the small side, I will be constructing this unit to accommodate a model that fits on no larger than a 16x32 stud base.
The only other materials required to build the light box are some sheets of regular copier paper, transparent tape, and some various colored sheets of poster board.
Also required is some sort of a bench or desk lamp that can be situated directly above the box so that it points directly down on the top.
To start out, remove any cardboard flaps from the open side of the box. These are not needed.
Next step is to mark out an opening on what will be the top of the box. Make sure there is a margin left on all sides of the opening for easy attachment of the paper filter that will be made later.
Carefully cut out the opening using a utility knife.
For this box, I am using standard copier paper. Two sheets were required with a splice to obtain the correct length. Make sure the final size of the paper cover is cut to overlap the box cutout by 1/2 inch on each side.
Now all that is left is to stretch the paper over the opening and secure with tape.
Done.
Now place a bench or desk lamp directly over the filter paper, set up your background and subject, and you are ready to start taking photos.
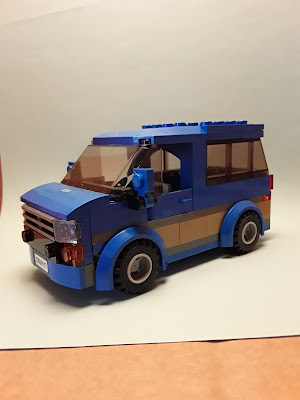
Here is an example of my first use of this new light box.
The model's background is merely a sheet of light blue paper, laid in so that it curves up from the floor to the back wall.
The model is positioned on the paper, and a bench lamp holding a 60 watt incandescent light bulb is placed directly overhead, shining down through the paper.
Here is the preliminary photo, taken with my Samsung Android phone.
So there you have it - a simple, poor man's photographic light box.
Build...
Create....
Photograph...
Enjoy!


No comments:
Post a Comment