Tuesday, December 27, 2022

A Spontaneous MOC Build

My ongoing parts re-organization project (frenzy?) has been blasting full bore this past week.

I finally got to the box labeled 'Mini-Fig Accessories'.  This is a plastic compartmented box into which any and all minifig tools, weapons, hats, etc. have been tossed with very little semblance of order.

Finding that one particular tool, knight's sword, hard hat, or wizard's wand usually is an exercise in frustration when trying to pick through the mess.

Clearly, it's time to do something about it.

I happen to have a small bag containing around 50 or so 1x1 tan plates with clip that I obtained at the PAB wall a couple years ago.

 I envisioned building a wall o' bricks integrating these parts onto which I could attach a good number of the smaller minifig tools and weapons for easy viewing and access.

As this simple little project progressed, things started getting WAY more creative, and I soon found myself surrounded by many boxes and bags of LEGO parts.

I had descended hopelessly into.....

(Cue dramatic music)

...THE MOC ZONE !!!

Here is the end result...

The MOC consists of two seperate back-to-back vignettes divided by a center wall.

The first is a pirate-themed weapons arsenal including everything from medieval battle axes to light sabers.


The other side is a workshop featuring my mini-fig doppelganger.

The shop clock on the back wall is accurate twice a day!


This was a very fun build, along with being a great storage system for minifig accessories!

Cheers...


Sunday, December 25, 2022

Back Clickin' Bricks

 This past week, my wife and I binged on watching season three of LEGO Masters on Hulu.

Of course, this inspired me to break out my tubs and boxes of LEGO.

However, instead of building anything, I ended up going through the entire collection of elements and re-organizing them into a system that makes it easier for portability to anywhere in the house. 

While I had a box of orange bricks out, the creative bug took over and I ended up knocking out this little Asian-style pergola just from the parts I immediately had on hand.

When I was done, the little project got photographed, then broken down to continue the parts sorting process.

Sometimes the simple, off-the-cuff projects can be the most rewarding...


Monday, December 19, 2022

A Parts Windfall

I have some neighbors across the street that are big into LEGO building.  Around Christmas time they do their shopping at the LEGO store to pick up the latest in the larger, costlier sets that are out.  We're talking Star Wars and others.

They usually come away with some smaller freebie VIP sets and parts assortments.

The other day, the gentleman stopped by and presented me with a LEGO shopping bag that contained several of these freebies:

 Two 40515 "Pirates and Treasure" VIP Add On Packs

One  40513 "Spooky" VIP Add On Pack 

One 40411 "12 in 1" parts selection

One 30574 Cat

All told, I added well over six hundred new parts to my stash!

The best part of this new stash is that, between the Pirate and Spooky sets, I acquired 10 new skeleton minifigs!


I see these guys as forming the basis for a lot of new brick-built comics.

Of course, I have given them the collective name, "The DDC Skeleton Crew"....

Cheers!


Thursday, July 7, 2022

R2D2, Part 15 -Finally Done !!

 Bag 13 of the Artoo set literally rounds out the top of the dome. This includes the droid's little retractable 'sensor' unit.

Here is the finished build:


Also in bag 13 is the display stand and a minifig R2.

At this point, the only thing that remains is to get the electronics wired up and running.

This will entail building a small circuit board for the array of limiting resistors as well as integrating a switch system and power source.

I will be engineering this portion over the next few days.

Stay tuned...


Friday, June 24, 2022

R2D2, Part 14 - Back to Brick Clicking

 Now that the lighting is installed, it's time to get back on the actual build with bag #12.

The parts therein build up the middle level of Artoo's domed 'head'.

Gotcha: one section of the construction consisted of an internal assembly in one of the corners.

To my consternation, this interfered with some of the wiring that was already in place.

I had to do some major dis-assembly of a portion of the earlier work and do some creative substitution of parts to allow the wires to be routed around the new addition.

Should have read ahead in the set instructions.

Anyway, I got it figured out and all is well.

Ready for the 13th and final bag o' parts!

Thursday, June 23, 2022

R2D2, Part 13 - More Droid Lighting

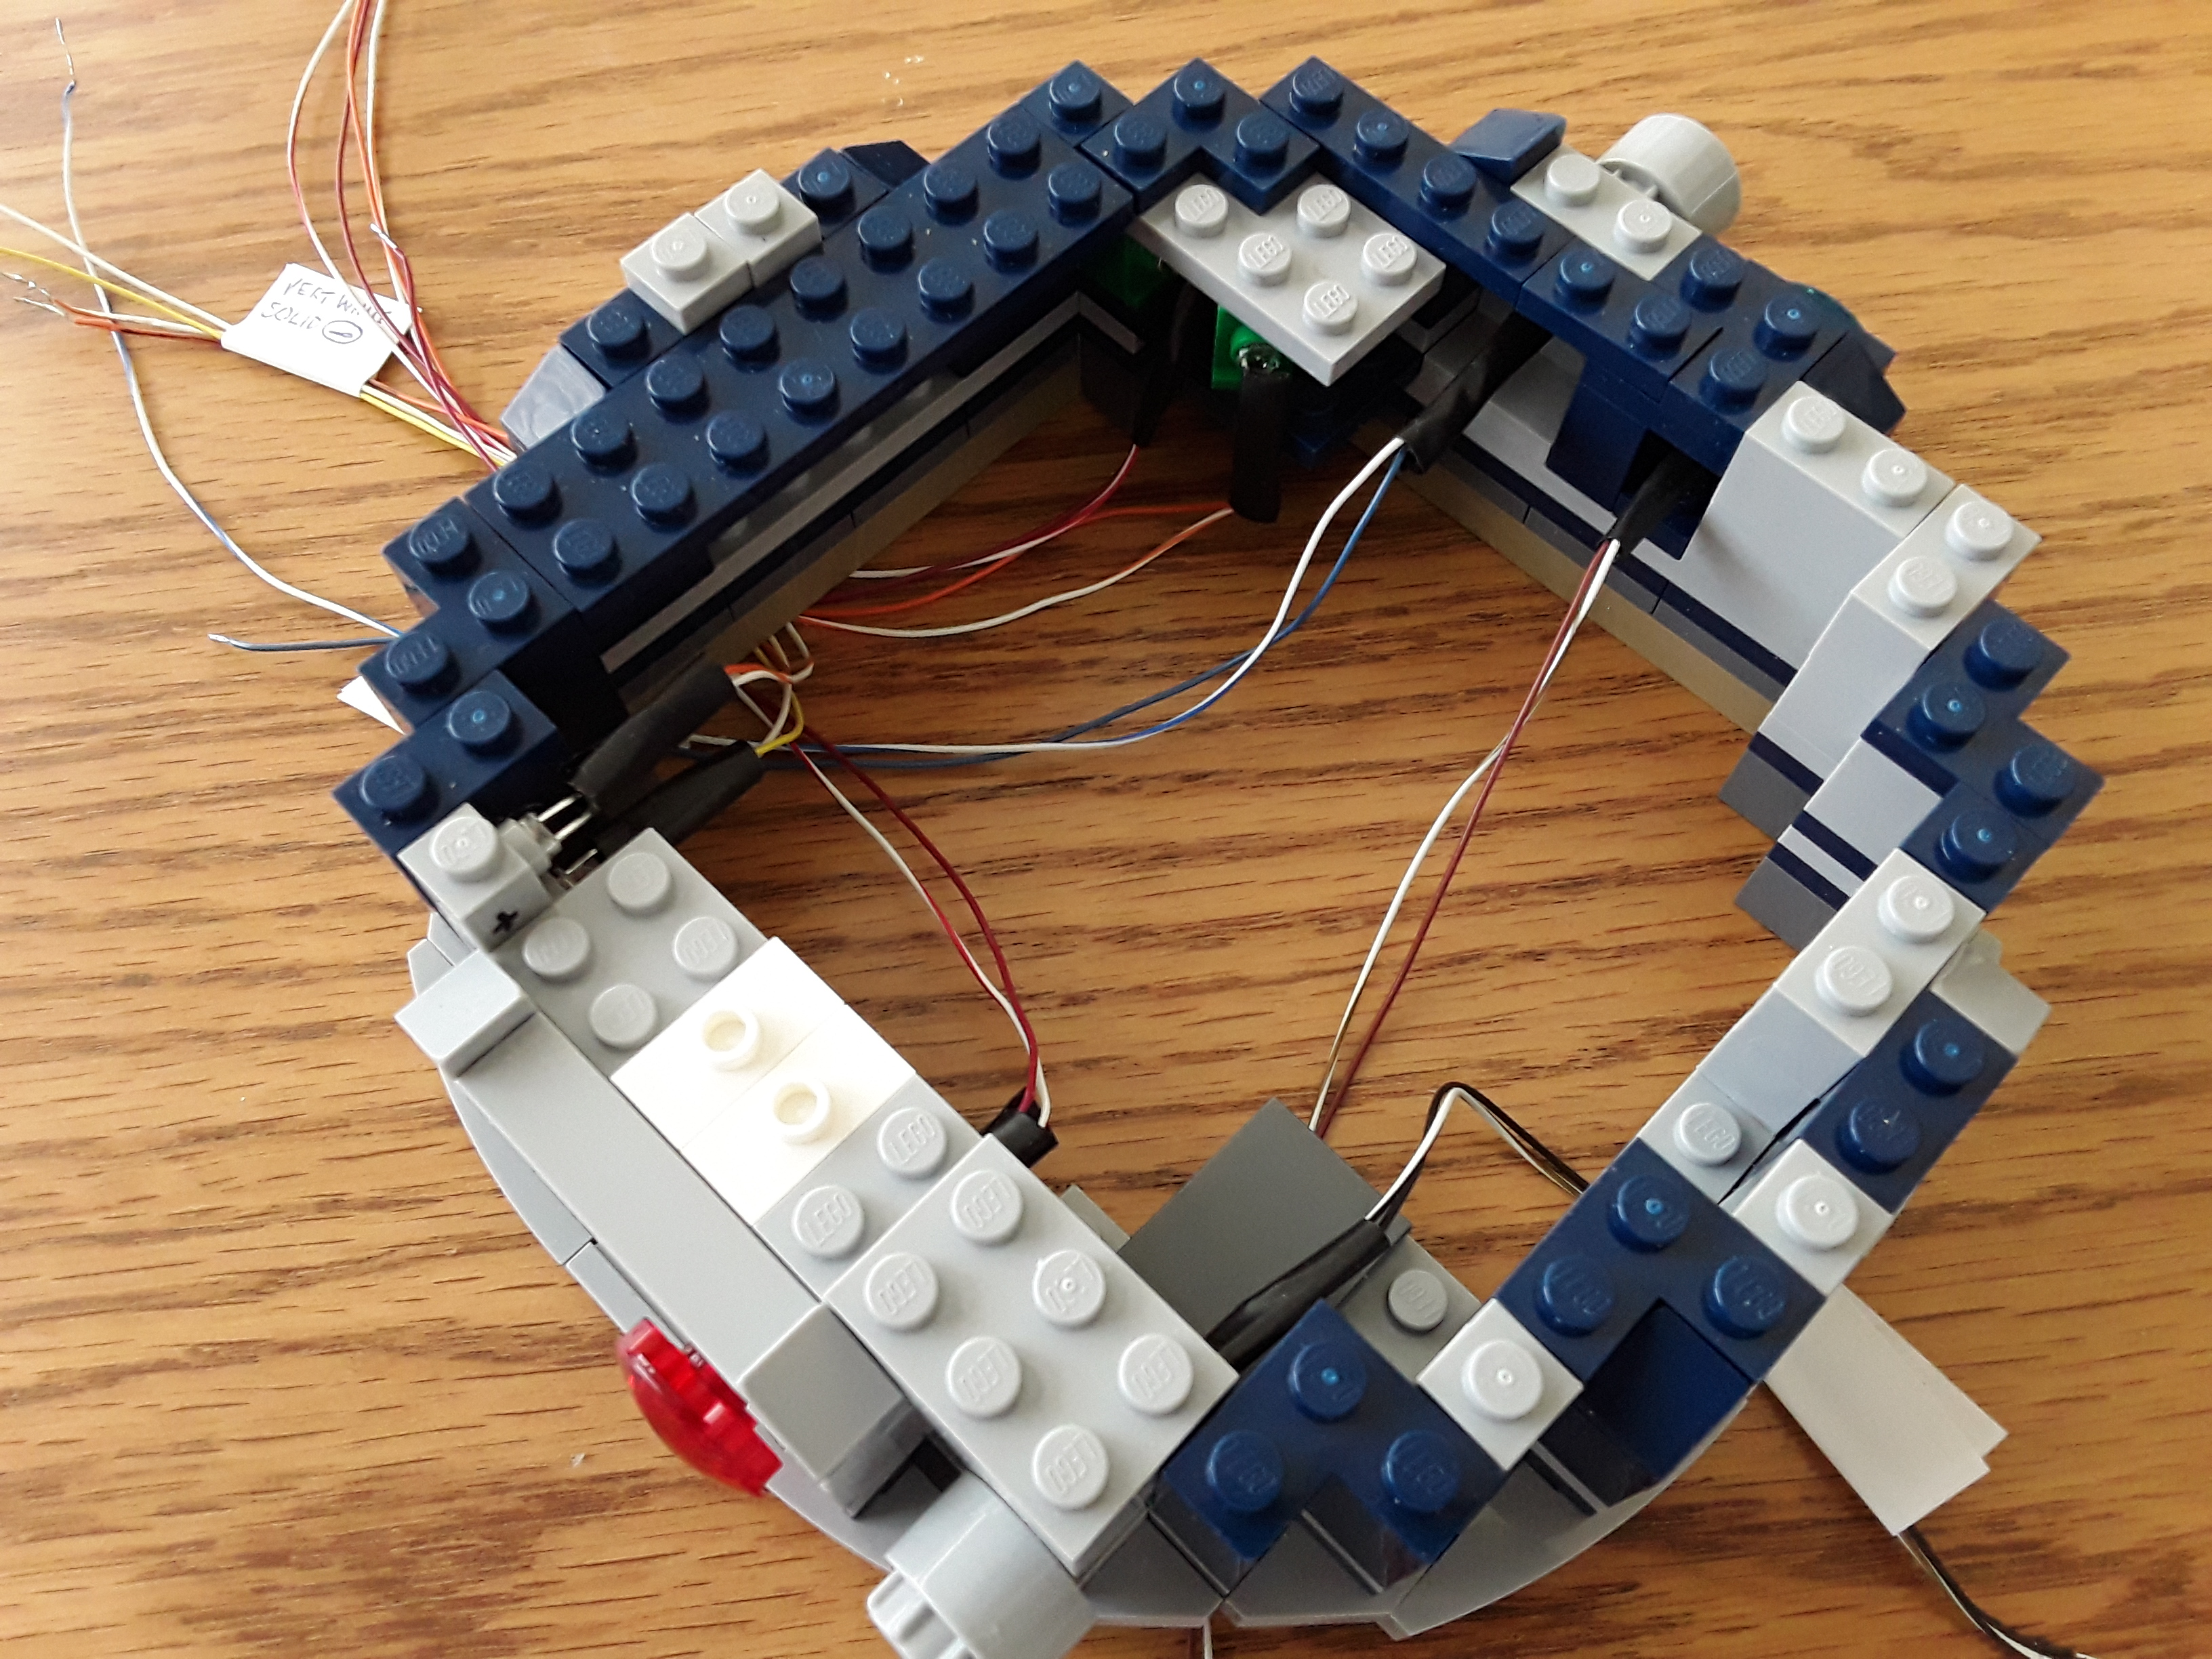
 Today, I completed the task of wiring up the LEDs and installing them in their various spots on the model. A total of eight are required to do the job. 

I tested them all out by plugging them into my circuit breadboard. So far everything looks real cool.

The next step is to complete the final two parts bags of Artoo's dome, then start figuring out how I am going to design and build the electrical circuit board, switch system, and power supply.

Here are pics of the finished lower dome section. I had to raid my parts stash on several occasions to find alternate elements that provided holes to allow wiring to pass through, while maintaining the integrity of the exterior detailing.

A couple of the LED locations were quite challenging in this respect.


Wednesday, June 22, 2022

R2D2, Part 12 - Droid Lighting

 Today, I changed my mind and decided that this point in the build would the best place to engineer the LED lighting effects. All of the components that will receive the treatment are easily accessible.

The initial step consisted of finding the features that would be the easiest to modify, then tackle the tougher ones later.

The first parts are the two vertical openings to the left of the trans red disc.

The original parts consist of two 1x1 'lantern' elements with trans light blue 'dome' elements inserted in the back.

These trans blue are simply replaced by a pair of 3mm blue LEDS. Some 22 guage wire is soldered onto the leads prior to attaching to the model.

The LEDS are a slightly loose fit into the holes of the LEGO pieces, so a drop of CA is necessary to keep them in place.

I'm usually averse to using glue on LEGO unless it's absolutely necessary.

I'm good with it here since this set will remain assembled and on display.

It must be noted here that I am designing the lighting system on the fly. Once all of the LEDS are in their respective places on the model, I will then decide what kind of power supply I want to use, as well as a switching arrangement. A small circuit board will be built to accommodate all of the limiting resistors needed for the individual LEDs.  These resistors must be selected to not only provide protection for the LEDS, but to also set their overall brightness level.

For the time being, here is a quick functional test on one of the LEDs:

Cheers...!